
Can you not turn your PID to a manual mode? I will usually set the PID to 209 while sparging or I'm not around so it doesn't come to a boil. Then set it to manual mode at 100% till boiling then turn it down to 75% to maintain boil.I'm not right next to it, but it's one of the Chinese digital controls you get off of eBay and it drives 2 SSR's, one for each heater. I only use the Proportional part of the control.I use an 8" long probe that hangs over the side of my converted sanke keg. The sensing tip is a good 12" or so above the heaters.


Another Electric Build from BlKtRe Labs
Started by
BlKtRe
, Mar 07 2014 01:09 PM
106 replies to this topic
#81

matt6150
-
- Patron
-

- 10549 posts
Moderately Accelerated Member
- LocationMooresville, NC
Posted 14 November 2014 - 11:22 AM
#82
Clintama
-

- Banned
-
- 30244 posts
No Life
- LocationRight Here
Posted 14 November 2014 - 11:30 AM
Can you not turn your PID to a manual mode? I will usually set the PID to 209 while sparging or I'm not around so it doesn't come to a boil. Then set it to manual mode at 100% till boiling then turn it down to 75% to maintain boil.
If by manual you mean, non-PID, then yes, that's how I keep it set. I don't use the integral and derivative functions. I tried on/off, but found a 1 or 2 degree proportional band to work a little better.
Actually, I do what you suggested. I set it on a lower temp and after it gets there I stand by and let it get to a full boil. That's really the best solution over trying to use the alarms. Of course, I inevitably get comfortable with it, walk away and have it boil over anyway.
#83
BlKtRe
-

- Members
-
- 16515 posts
Comptroller of le Shartes
- LocationThe Land of Oz
Posted 14 November 2014 - 12:20 PM
I rather have my PID control my boil vs manual mode. I mean after all its one of the whole reasons behind my build.
#84
matt6150
-
- Patron
-
- 10549 posts
Moderately Accelerated Member
- LocationMooresville, NC
Posted 14 November 2014 - 01:00 PM
When I say manual the PID is still controlling the element. It's just that you set it to a percentage of the full power of the element rather than a temp. If its just set to 212 degrees it tends to not have a consistent boil. Either not enough or its boiling over. In manual mode on the PID you can set it to 75% power and it will hold a nice boil much easier.
#85
HVB
-

- Patron
-
- 18067 posts
No Life
Posted 14 November 2014 - 01:03 PM
I also set mine to 75% the only difference is I went with a pwm controller instead of a PID.When I say manual the PID is still controlling the element. It's just that you set it to a percentage of the full power of the element rather than a temp. If its just set to 212 degrees it tends to not have a consistent boil. Either not enough or its boiling over. In manual mode on the PID you can set it to 75% power and it will hold a nice boil much easier.
#86
Clintama
-
- Banned
-
- 30244 posts
No Life
- LocationRight Here
Posted 14 November 2014 - 01:22 PM
Matt, my control doesn't have the manual option.
#87
BlKtRe
-
- Members
-
- 16515 posts
Comptroller of le Shartes
- LocationThe Land of Oz
Posted 14 November 2014 - 01:28 PM
When I say manual the PID is still controlling the element. It's just that you set it to a percentage of the full power of the element rather than a temp. If its just set to 212 degrees it tends to not have a consistent boil. Either not enough or its boiling over. In manual mode on the PID you can set it to 75% power and it will hold a nice boil much easier.
Gotcha, I have never worked with PID's before so I haven't had the chance to learn these things. Yet.
#88
BlKtRe
-
- Members
-
- 16515 posts
Comptroller of le Shartes
- LocationThe Land of Oz
Posted 01 December 2014 - 03:33 PM
Just purchased 65ft of #6/3. A certain body orifice is a lot larger now. 
I'm also pulling another 12/2 to add another 120v circuit along another wall of my brew room. I will now have 5 separate 120v circuits in my brew area. My keg washer when in use needs 2 different circuits to run it. This will make room for my ferment fridges too.
Edited by BlKtRe, 01 December 2014 - 03:34 PM.
#89
BlKtRe
-
- Members
-
- 16515 posts
Comptroller of le Shartes
- LocationThe Land of Oz
Posted 04 December 2014 - 02:36 PM
Well, there are lights anyway.......
#91
BlKtRe
-
- Members
-
- 16515 posts
Comptroller of le Shartes
- LocationThe Land of Oz
Posted 04 December 2014 - 05:05 PM
Getting closer!
Yea, I have a mis-wire with my 3 way switch that should be something simple. My lights are turning on opposite of what they should.
#92
djinkc
-

- Patron
-
- 32138 posts
Comptroller of Non-Defending Defenders of Inarticulate Twats
- Locationout the backdoor
Posted 04 December 2014 - 06:03 PM
Looks nice my friend. I would like to see that thing in action.
#93
BlKtRe
-
- Members
-
- 16515 posts
Comptroller of le Shartes
- LocationThe Land of Oz
Posted 10 December 2014 - 12:15 PM
Its a start, I had this SS rack somebody gave years ago I stuffed in the barn figuring I could use it someday. Topped it off with some cedar plank. I need to add some more support and get it lowered. I can hack off 7" which would be perfect just by removing the crap casters and taking 3" off the upright supports. It would be nice to have casters but this thing is light anyways. The uprights already have holes with bushings already in the right places to mount pumps and my RIMS. I also have some real nice AL channel I found that will added along the front to run the wiring for the pumps, RIMS and the RTD cables to tidy it up.
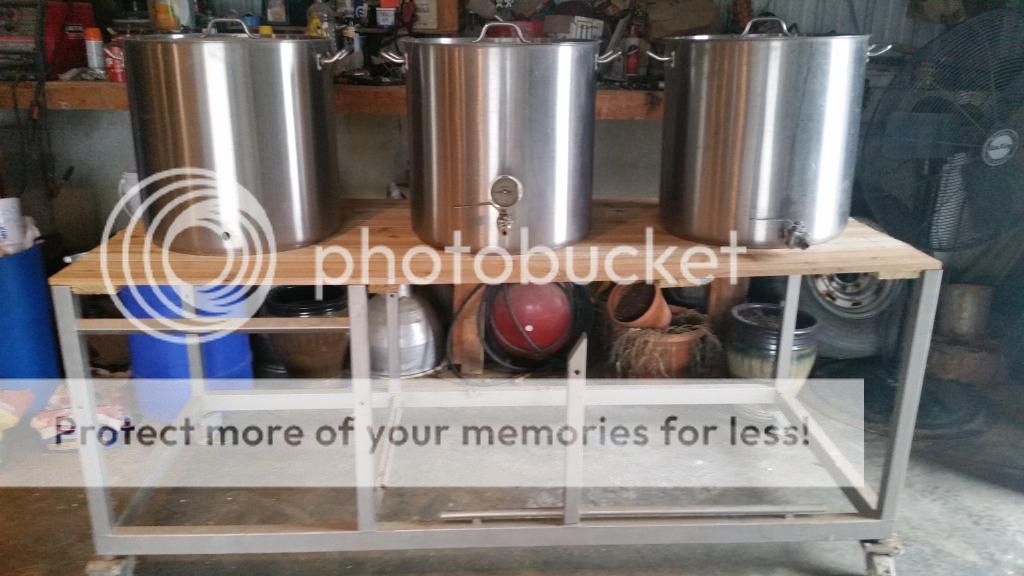
Edited by BlKtRe, 10 December 2014 - 12:19 PM.
#94
BlKtRe
-
- Members
-
- 16515 posts
Comptroller of le Shartes
- LocationThe Land of Oz
Posted 29 December 2014 - 01:30 PM
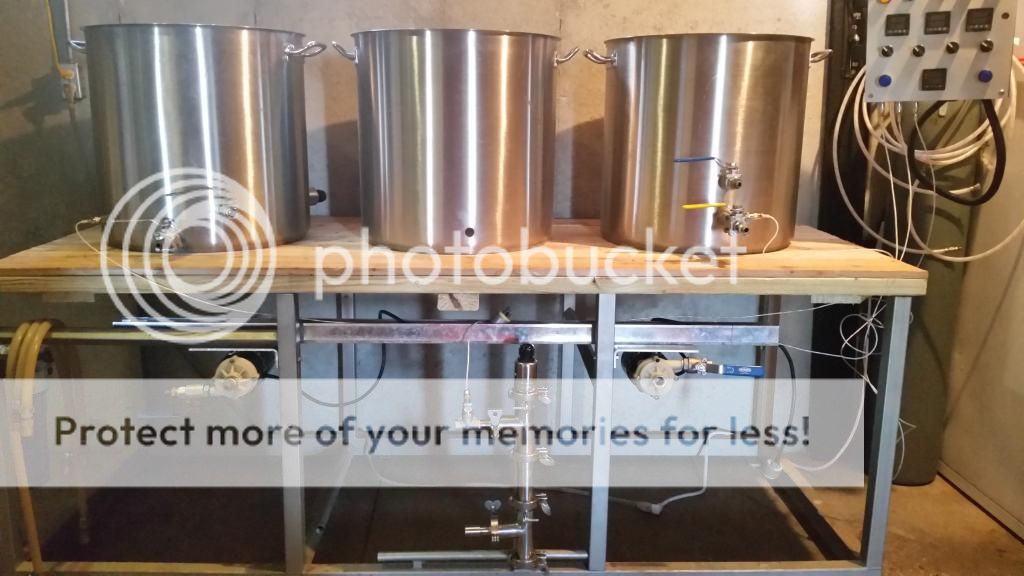
Another day closer. Pumps and RIMS mounted. The HLT and BK are complete. I just need to build manifolds for the MT then wire up the elements and the pumps to the control panel. I decided to silver solder the 1.5" TC fittings for the elements to the vessels. Was super easy and got good penetration with the solder behind the fittings. Very strong. I can pick up the 25g kettles by the fitting. We will see how temp swings will effect the solder joint over time. I also need to buy a longer RTD cable for the BK. I also mounted a rail to hide the wiring underneath the table top.
#95
BlKtRe
-
- Members
-
- 16515 posts
Comptroller of le Shartes
- LocationThe Land of Oz
Posted 29 December 2014 - 01:34 PM
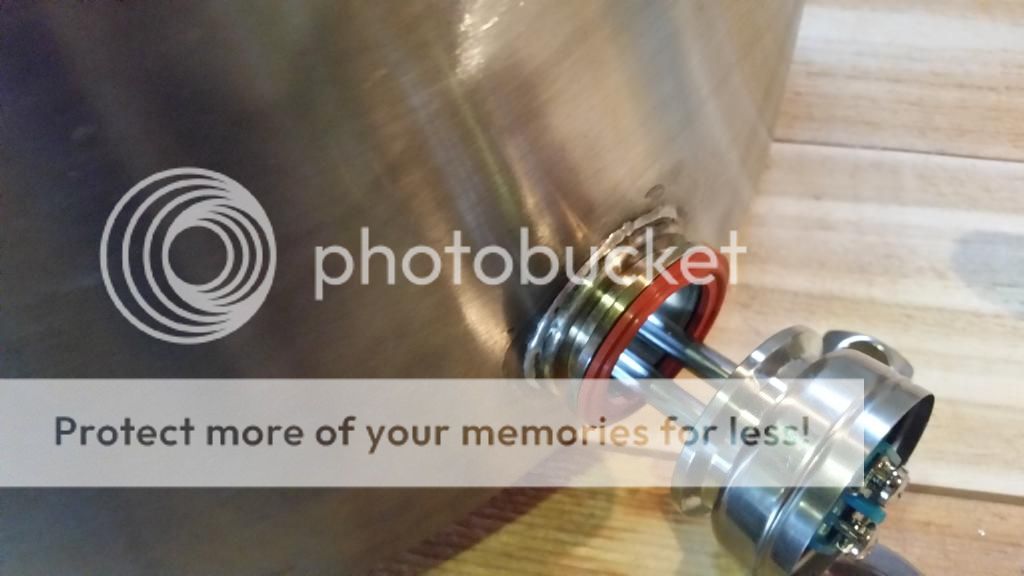
Whirlpool fitting works excellent. I went ahead and got one of Bobby's SS elements for the BK.
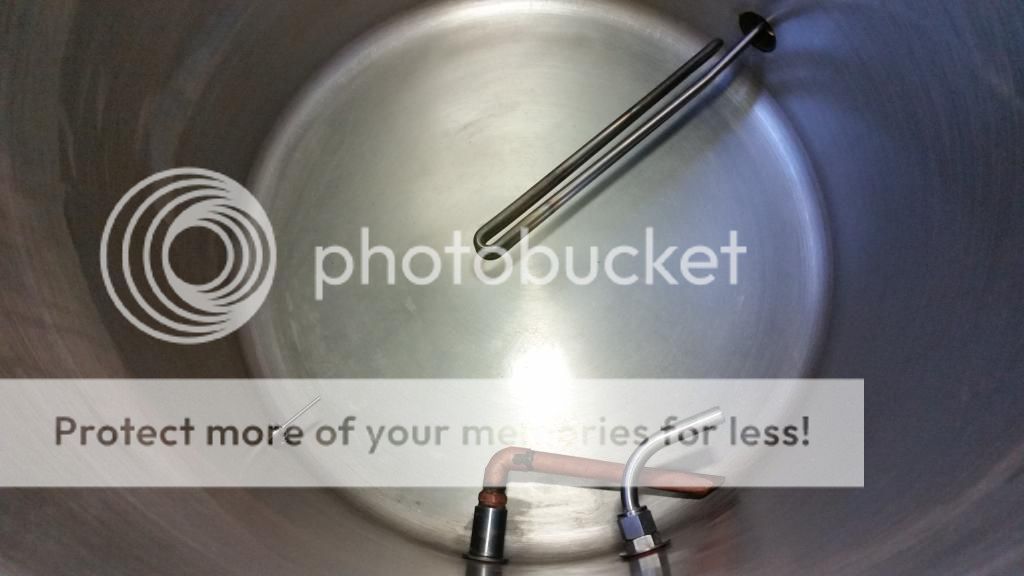
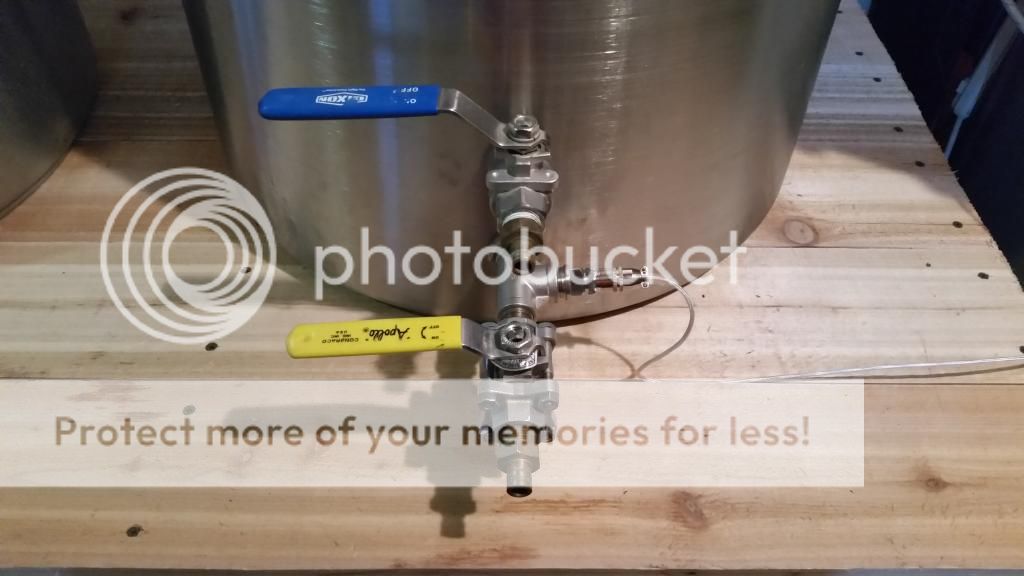
The return on the HLT is the upper valve to stop any stratification while heating strike and sparge water.
#96
HVB
-
- Patron
-
- 18067 posts
No Life
Posted 29 December 2014 - 01:35 PM
I can not imagine the silver solder would have issue with temp. I have some silver brazed couplings that have had no issues.
Looking good though... have you planned the batch for the maiden run?
#97
BlKtRe
-
- Members
-
- 16515 posts
Comptroller of le Shartes
- LocationThe Land of Oz
Posted 29 December 2014 - 01:39 PM
I can not imagine the silver solder would have issue with temp. I have some silver brazed couplings that have had no issues.
Looking good though... have you planned the batch for the maiden run?
Black IpA in 2 weeks, Magnum, Simcoe, Amarillo, and Citra for sure. Might add some Mosiac to the mix also. I'm inviting a good friend over for the maiden run. I normally brew by myself on maiden runs in the past but this is a special brew with a special friend.
Edited by BlKtRe, 29 December 2014 - 01:40 PM.
#98
HVB
-
- Patron
-
- 18067 posts
No Life
Posted 29 December 2014 - 01:46 PM
Black IpA in 2 weeks, Magnum, Simcoe, Amarillo, and Citra for sure. Might add some Mosiac to the mix also. I'm inviting a good friend over for the maiden run. I normally brew by myself on maiden runs in the past but this is a special brew with a special friend.
Sounds good to me!! Good luck 
#99
BlKtRe
-
- Members
-
- 16515 posts
Comptroller of le Shartes
- LocationThe Land of Oz
Posted 10 January 2015 - 08:02 AM
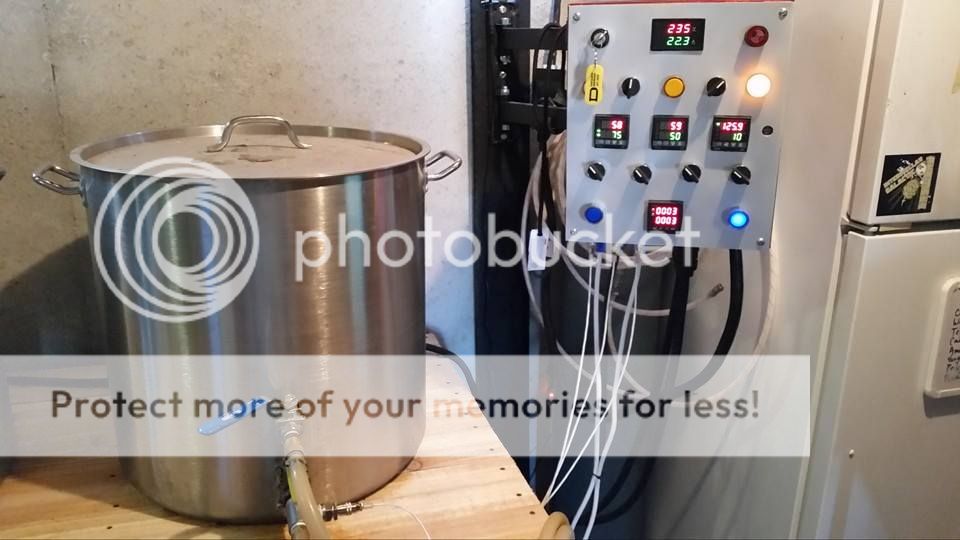
Just like to thank Matt and Drez for all the help and inspiration. Took a year to get this thing off the ground from looking at pics on here, asking tons of questions, learning this stuff, to finally getting to the hot water test. I found out how to run PIDs (for our application) which I've never done before. I followed my entire process during the hot water test and made some inputs on each PID as I went along. I found a few minor issues mainly with the RIMS but nothing that cant easily be figured out. I was thrilled to turn this thing on and everything worked. I will be brewing my first batch on this new rig in a few days. Thanks again for all the help along the way. Without this place no way I could of built this thing.
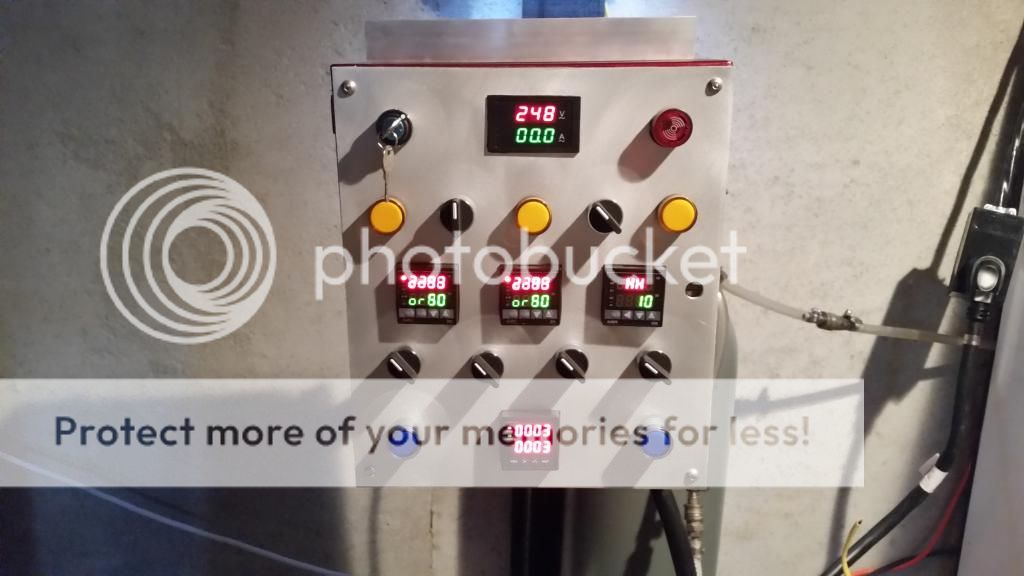
Just started the hot water test in the HLT and was playing with settings. I was thrilled the element actually worked! I didn't expect the element light to pulse on/off with the PID power.
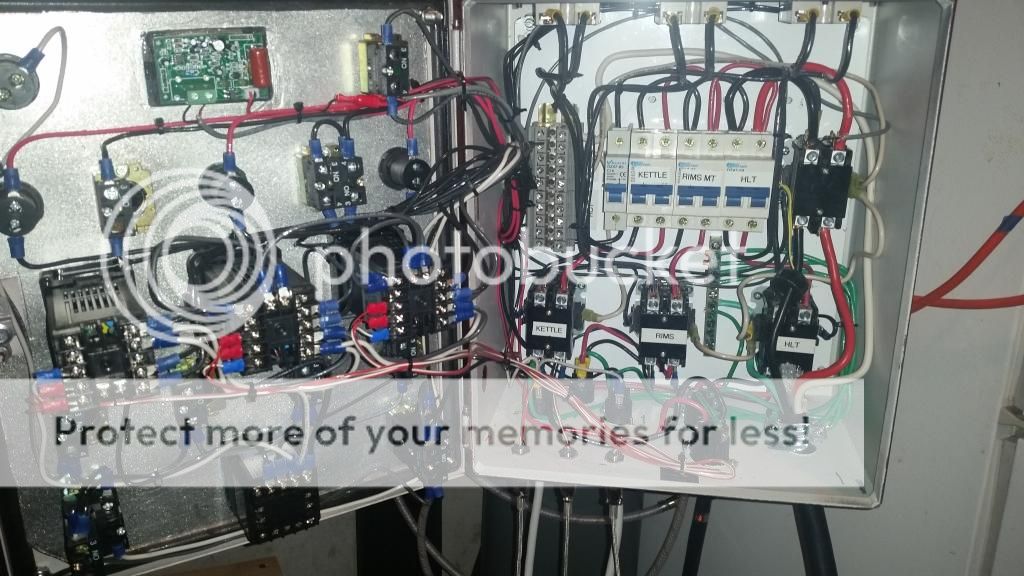
The inside. I've since found a nice cord grip for the power in and added a knock out plug where the hole is in the left side. This box is on the small side for what I needed but I made it work and wasn't going to turn down a great deal from Matt. One of the reasons its so tight is because I liked the Neutrik Powercon disconnects making the connection tight to the contactor's difficult.
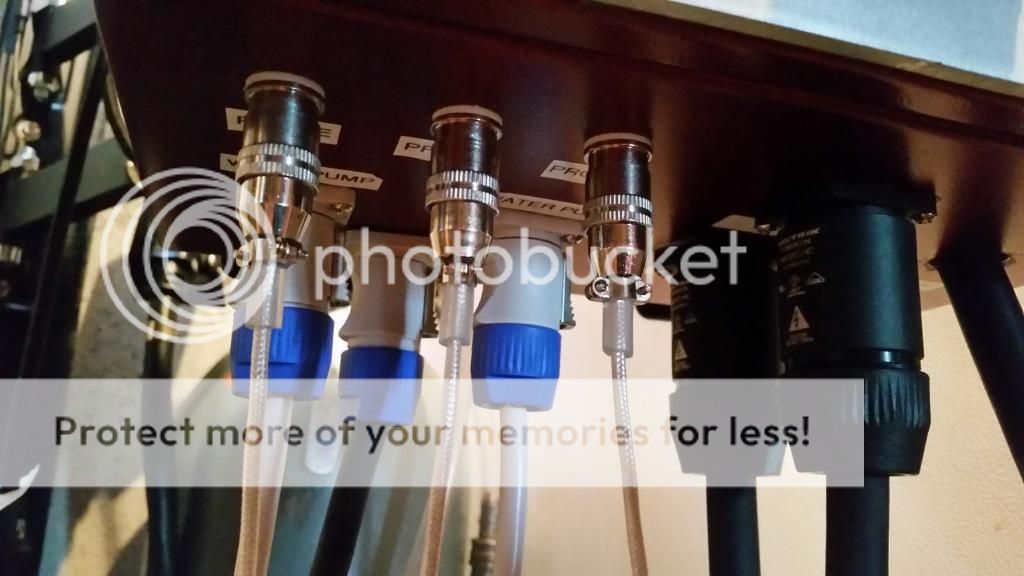
Neutrik Powecons and the Auber panel mounts for the probes. Those Auber panel mounts Have QD's at each end of the wire.
#100
Buzz Buzzard
-

- Members
-
- 12316 posts
Comptroller of Fanatical Political Expressionism
- LocationHere, not there.
Posted 10 January 2015 - 08:10 AM
Friggin' awesome.
0 user(s) are reading this topic
0 members, 0 guests, 0 anonymous users

